The American Welding Society (AWS) published the standards of weld quality and safety which is upheld by Certified Welding Inspectors (CWIs) and Certified Welding Educators (CWEs). It is important that CWIs and CWEs use the most advanced inspection equipment and visual inspection methods available in order to adhere to these crucial standards. Specialized cameras are used during the weld process and NDE equipment is utilized in order to achieve complete weld quality assurance.
History of Welding Industry Quality Standards
Joining metals dates back to the Bronze and Iron Ages in Europe and the Middle East. It wasn’t until the Industrial Revolution in the 19th century that the modern-day electric arc was discovered. Up until World War I and II, electric arc welding techniques and technologies remained rudimentary. The manufacturing industry, especially in the United States, saw a mass increase in demand for military equipment during this time, resulting in quality standardization becoming a necessity.
As the welding industry rapidly accelerated, scientific standards needed to be documented objectively and published. The Welding Journal began continually being published in 1922, and has since published more than 100 codes, procedures and safety regulations that provide welding quality assurance across the global industry. Demand grew for weld inspection technology in order to uphold these standards and keep pace with this rapid, scientific evolution of the industry that could satisfy the complex quality standards and regulations.
Visual Examination
The primary method to control satisfactory welding in today’s welding industry continues to be unaided visual examination. The key performance indicator for ensuring weld quality before, during and after the weld process remains to be the experienced set of eyes. Visual examination is essential to ensure joint fitup, setting and marking hold/check points, and checking for base metal discontinuities and cleanliness. Unless the target area of the weld is blind, this sets the groundwork for a proper weld and usually requires no visual aid equipment. Technology doesn’t play a huge role in quality assurance until the actual weld process begins.
Live Weld Viewing
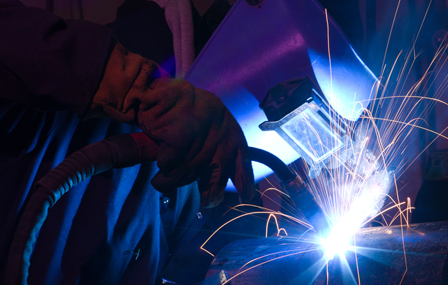
Visual examination of welding usually occurs before and after the actual welding takes place, but live viewing remains extremely limited because of the bright and harmful UV light produced by the arc. Although difficult, it is possible to view a live weld with welding glass shields or helmets. Valuable information during the welding process is provided by specialized wide-dynamic range cameras to give CWIs additional advantages to control the welding quality, and thus save time and material.
Different exposure values of the bright arc are able to be taken through new digital camera technology along with software. These exposure values are compiled into one homogeneous, viewable image. These images are used by Certified Welding Inspectors to analyze live welds to keep its quality up to industry standards. In automated tube fabrication, for example, an inspector/operator is able to notice when the arc shape is malformed or alignment is off, and can adjust or shut down the automated process to save time and material.
CWIs can analyze the footage of the root pass and passes with cameras that have recording capabilities in order to verify electrode alignment with the weld joint. During the postweld inspection, the cause of an unsatisfactory weld joint can be reinforced with this visual evidence. These images are valuable educational tools that a CWE can use in the classroom.
Live Weld Viewing in the Classroom
Viewing a live weld arc by welders in training proves to be extremely important in a classroom. Pre- and postweld inspection visual examination techniques are easily taught with AWS Standards. Teaching what to look for during the welding process can be more difficult though. Using weld viewing camera images on a large monitor display gives students important examples as to why welding defects may occur. Such things as as improper arc shapes and colors, bad alignment of the electrode/torch in relation to the welding joint and the pool formation and size can all be shown to multiple students at once on a display monitor with live weld viewing cameras.
Postweld Inspection
It is often imperative to use appropriate NDB equipment, and at times, use destructive examination techniques to effectively complete a thorough weld inspection and achieve weld quality assurance. Although such defects as incorrect weld geometry, porosity, and cracks can easily be identified by the eye, not all weld defects are discoverable from a surface visual examination. Defects below the welding surface, such as slag inclusion, can be revealed with the use of important ultrasonic and radiographic testing methods.
Postweld assessments are made easier by using NDE methods in conjunction with recorded visual images from the live weld cameras when gauging whether or not the performed work meets industry standards. Additionally, how to use NDE equipment to find welding defects can be instructed to students by the CWE and reinforcing the defects that occur by reviewing the recorded visuals.
Destructive welding is the final postwelding testing technique. The weld is proven to be sound with bend and pull tests and macrographs of weld cross sections, which can be useful educational examples.
Conclusion
AWS Welding quality standards are upheld by Certified Welding Inspectors and Educators with the latest inspection technology and effective training with the use of this technology. Not only must appropriate inspection methods and testing equipment be used during every phase of the weld process, but should also be used in tandem to ensure complete weld quality assurance during production. The backbone for inspection remains to be the visual examination and documentation before, during and after the basic and advanced weld processes. There is a higher demand today for utilizing more innovative weld inspection technology for maximum production efficiency because time and materials are more costly.
Not only is weld inspection technology an aid, it is also a critical component to ensure applicable quality and safety standards are met. It is important that camera technology is used by CWIs and CWEs while the weld is taking place to illustrate and analyze critical aspects of why and how defects, such as porosity, cracks and slag inclusion may occur. The use of ultrasonic and X-ray NDE equipment, additionally helps to identify subsurface defects that disqualify a poor weld. The chances of missing a weld defect will decrease with the comprehensive use of these testing methods during the various stages of welding.
More welding techniques and methods will be invented, innovated upon, and implemented in manufacturing and construction weld processes as we move forward in the 21st century. The quality of parts, assemblies and structures will continue to become more complex. It is only natural for the highest quality welding methods and industry standards to keep pace with our evolving, globally industrial world. Inspection-technology tools must be innovated and utilized to help the manufacturing and construction industries continue to flourish in order to meet or exceed these standards.
Source: aws.org


Mary Galban-Cass liked this on Facebook.